


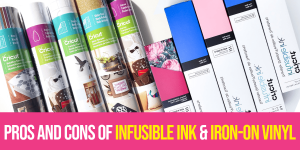
Infusible Ink vs Iron-On Vinyl

Iron-on vinyl vs infusible ink: what are they and what is the difference? Use either of them to make easy DIY graphic tees!
Iron-on vinyl or heat transfer vinyl has been around for crafters to use for a long time. Cricut has recently released infusible ink, so I made a DIY graphic t-shirt using both infusible ink and iron-on vinyl.
I teach how to use each of them and how they are different from each other.
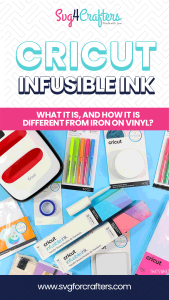
WHAT IS INFUSIBLE INK?
Infusible ink is ink that is transferred by heat. It’s essentially sublimation, but it’s now accessible to hobby crafters. When infusible ink is transferred the ink is infused into the item.
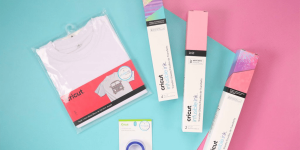
Infusible ink can be purchased as an infusible ink transfer sheet and as infusible ink pens. The colors of the infusible ink transfer sheet look pale before being heated, but they are very bright once heated and transferred.
I’ve also tried infusible ink on three t-shirts made of different fabrics, polyester, 50/50 cotton/polyester, and cotton, to see the difference it would make!
HOW TO USE INFUSIBLE INK
- Cut infusible ink transfer sheet. When cutting with a cutting machine, the ink is right side up but the mirror option needs to be on.
- Heat up an EasyPress 2 to 385 degrees.
- Weed the negative part of the design.
- Place a piece of cardstock between the layers of fabric.
- Place a piece of butcher paper on top of the area.
- Heat the area with an EasyPress 2 for 15 seconds.
- Remove paper and place design face down on the t-shirt.
- Place butcher paper on top of the design.
- Heat the design for 40 seconds.
- Carefully remove paper to not disturb the design.
- Cool completely and then peel.
WHAT IS IRON-ON VINYL OR HTV?
Iron-on vinyl or heat transfer vinyl is vinyl that has glue on the back that is activated when heated. When the iron-on vinyl is heated the glue causes the iron-on vinyl to be fused to the t-shirt. The iron-on vinyl sits on top of the fabric.
The color of the iron-on vinyl is the color it will be after being heated. The color does not change.
HOW TO USE EVERYDAY IRON-ON VINYL
- Cut iron-on vinyl. When cutting with a cutting machine, the vinyl is right side down and the mirror option needs to be on.
- Heat up an EasyPress to 315 degrees.
- Weed the negative part of the design.
- Heat the area with an EasyPress for 5 seconds.
- Place design face down on the t-shirt.
- Heat the design for 30 seconds.
- Flip the item over and heat the back of the design for 15 seconds.
- Peel the design when it’s warm or cold.
PROS AND CONS OF INFUSIBLE INK
Pros:
- Infuses into the fabric
- Doesn’t crack, peel, wrinkle
- Looks professional
- Can be cut with any cutting machine
- Stretches with the fabric
- Easier to weed negative part of the design
Cons:
- Must be used with an EasyPress 2
- Must be used with Cricut Blanks or polyester
- Must be used on white or very light colored blanks
- Cannot be larger than the press’ heat plate
- Can only be heated once
PROS AND CONS OF IRON-ON VINYL
Pros:
- Can be used with any heat product (heatpress, iron, easypress)
- Can be ironed onto almost anything
- Looks professional
- Can be larger than the press’ heat plate
Cons:
- Can crack, peel, or wrinkle over time
- Sits on top of the fabric
- Most iron-on vinyls don’t stretch
- Can be hard to weed negative part of the desig
Save and share
If you liked this tip, save it to your craft tips board on Pinterest for later.You can click on the Pinterest button below to save it easily to Pinterest,or share it in social media using other social media button .